Popup Maker keeps up developing and realizing more great ideas for our users every day. This time it’s even cooler! Now Popup Maker has an integration with Zapier service. Zapier simplifies the integration of 1000+ apps.
Zapier integration will allow you to integrate with any application with the Popup Maker service. No need to have integrations with each app separately or use embed codes to use them with Popup Maker anymore.
You can collect subscribers or contacts in any application you wish, through the popups by Popup Maker, simply connecting our service and the app you wish in Zapier. It’s so easy! So let’s see the steps.
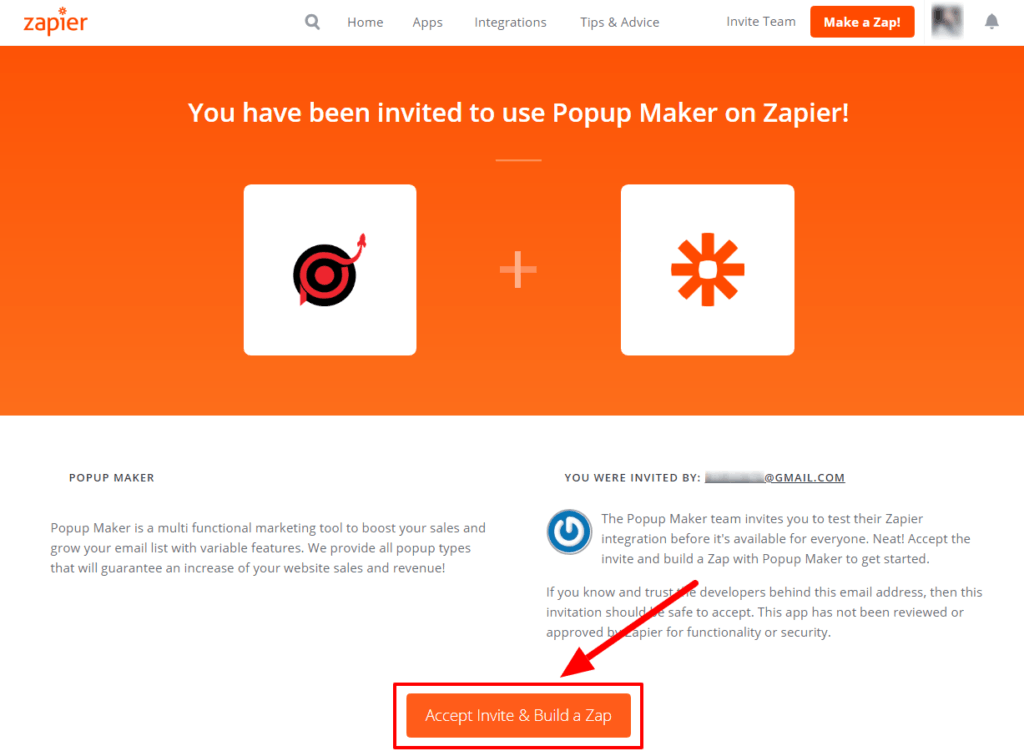
Step 1: Getting started
First of all, you should accept the invitation from Popup Maker to Zapier to start the process.
Click on the following link to accept the invitation: Popup Maker Zapier Invitation.
Now click on the “Accept Invite & Build a Zap” orange button to proceed.
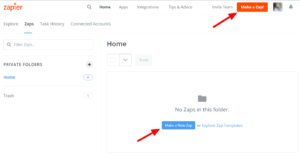
Step 2: Make a Zap
After accepting the invitation, click on the “Make a Zap” orange or blue buttons you see on your screen to start the building and the connection process.
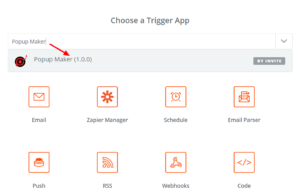
Step 3: Choose Popup Maker as the Trigger App
In the search field, type “Popup Maker” to find the App and select it to proceed.
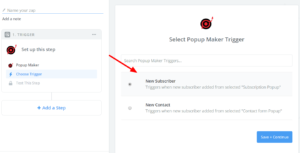
Step 4: Select Popup Maker Trigger
Here you should specify if you’re going to collect subscribers or contacts. Accordingly, you will use a Subscription or a Contact form from your Popup Maker account. (We will show the example on Subscribers here.)
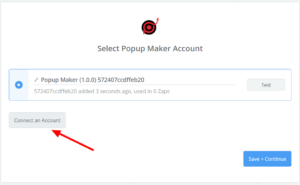
Step 5: Connect Your Popup Maker Account to Zapier
Now you should add your Popup Maker API key to connect your account to Zapier. Simply paste your API key from Popup Maker here and connect your account.
Check the steps in the following guide to get your Popup Maker API key: How to get your Popup Maker API key?
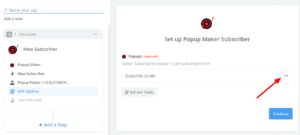
Step 6: Choose a Popup
So next step is choosing and generating a popup that you have already created on your Popup Maker account. In this example, it is a Subscription popup.
*Please, make sure you have already collected some amount of subscribers on your list to be able to test the Zap.
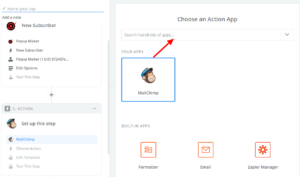
Step 7: Choose the Action App
Here, you should select the second app you want to connect to Popup Maker. It can be anything you wish; MailChimp, Aweber, Twitter, Google Sheets, etc.. Our example is showing the connection with MailChimp. So we have chosen MailChimp from the list.
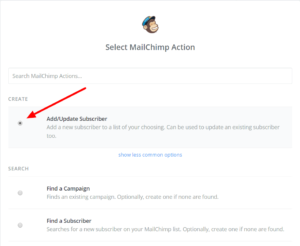
Step 8: Select MailChimp Action
Now, select “Add/Update Subscriber” to start collecting subscribers to your MailChimp list through the popup as soon as the setup is finished. You should log in to your MailChimp account as well, connect it with Zapier and Popup Maker.
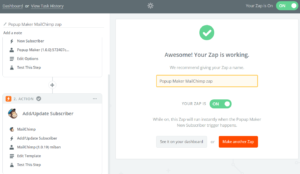
Step 9: Finish
Now that everything’s set up, you can sit back and watch how your subscribers’ list is growing through a simple popup created on Popup Maker!
Keep up with our updates, because the best is yet to come with a Popup maker! 😉